Capturing your epic gaming moments on Xbox is easier than you might think, and at SupremeDuelist.blog, we’re here to guide you through every step. Whether you’re aiming to share your impressive skills, create engaging content, or simply relive your best plays, recording gameplay is a valuable tool for any Xbox enthusiast. This guide will cover everything from the basic built-in recording options to more advanced techniques. We will explore how to use the console’s recording features, as well as delve into external solutions, all while ensuring you’re getting the best possible quality for your videos.
This article will break down the various methods for capturing gameplay on your Xbox, making it accessible to both casual gamers and aspiring content creators. We’ll cover the built-in recording features on both Xbox Series X/S and Xbox One consoles, and explore how to best manage your captured clips. For those looking to elevate their recordings, we’ll also discuss external capture cards and their benefits. By the end of this guide, you’ll be equipped with the knowledge and tools to start recording your Xbox gaming adventures like a pro.
Built-In Xbox Recording: The Basics
The most straightforward way to record your gameplay is using the built-in recording tools on your Xbox. This feature is conveniently integrated into the console’s operating system and is accessible with the press of a button. Let’s look at how you can do this on both Xbox Series X/S and Xbox One. For those interested in expanding their gaming experience, learning more about xbox series x 120fps games can significantly impact the quality and smoothness of your gameplay recordings.
How to Record Gameplay on Xbox Series X/S
The Xbox Series X and S consoles have a remarkably simple and effective built-in recording system. To start, simply press the Xbox button on your controller to bring up the guide. From there, navigate to the “Capture & share” tab. You’ll see options to start recording, take screenshots, or review your recent captures. To start recording, select “Start recording.” The console will begin recording in the background.
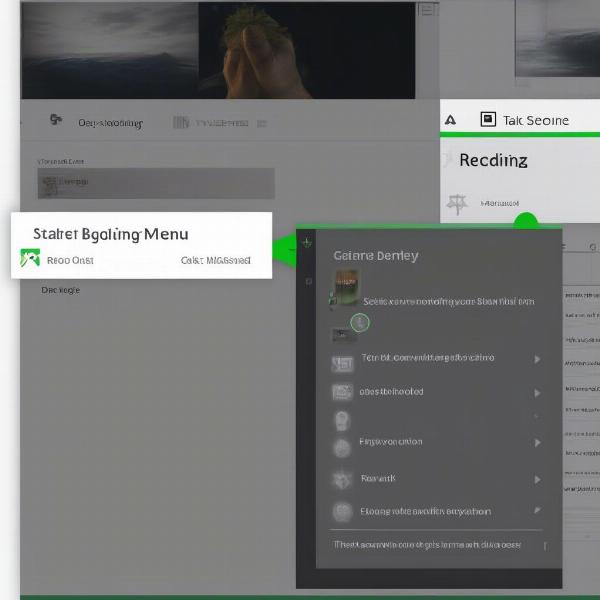 xbox series x capture menu
- Starting a recording: You can start a recording at any time, even while you’re in the middle of a game. The console will continuously record gameplay in the background, allowing you to capture those unexpected, awesome moments.
- Stopping a recording: To stop recording, press the Xbox button again, navigate to the “Capture & share” tab, and select “Stop recording.” Your clip will be saved, and you’ll be able to access it from the same menu.
- Adjusting recording time: You can adjust the default recording time in the capture settings. This is useful for capturing longer or shorter gameplay segments. You can choose from a variety of options, including 15 seconds, 30 seconds, 1 minute, and more.
Recording on Xbox One
Recording gameplay on the Xbox One is very similar to the Series X/S experience. Press the Xbox button to bring up the guide, and then navigate to the “Capture” tab. From there you can select “Start Recording”. This starts a recording that will run in the background. To stop the recording, bring up the guide and select “Stop Recording”. Your clip will be saved in the “Manage captures” section.
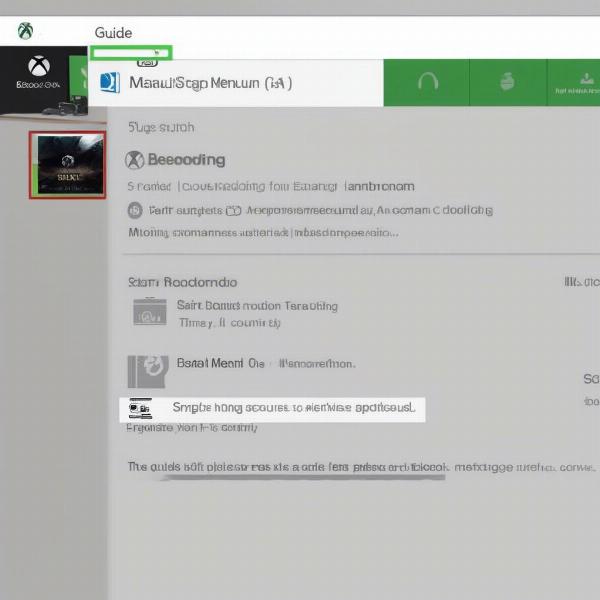 xbox one capture menu options
The Xbox One offers slightly different recording durations compared to the newer consoles, but the process is fundamentally the same. This built-in functionality makes it incredibly easy to start recording even without technical knowledge. If you are looking for a console with some games already included, you might consider checking out the options for an xbox one with games ebay.
What file format is an Xbox recording?
Xbox recordings are saved in MP4 format, which is widely compatible and easy to share or edit on various platforms.
Advanced Recording Tips and Techniques
While the built-in recorder is convenient, there are ways to enhance your recordings and further customize your experience. Let’s delve into some of the advanced recording techniques. In particular, understanding how to manage your recordings after you’ve captured them is critical. Consider reading more about deleting game captures on xbox network so you know how to manage your available storage.
Customizing Recording Settings
Both Xbox Series X/S and Xbox One allow for some customization of your recording settings. To access these, navigate to “Settings” > “Preferences” > “Capture & share” on your console. Here are some key settings you can adjust:
- Recording Length: Adjust the duration of your clips, from short snippets to longer gameplay sessions.
- Resolution and bitrate: You might find options to adjust the resolution and bitrate for your recordings. These settings can impact file size and visual quality. Higher resolution and bitrate settings will generally result in better looking videos but will also require more storage space.
- Audio settings: You can also adjust audio settings, like including party chat or only game audio in your recordings. This lets you focus specifically on what you’d like to capture.
- Storage Options: Your Xbox may give you options for saving your clips to internal or external storage. Be sure to pick the storage options that work best for you.
“Experimenting with these settings is crucial,” says game recording expert, Anya Sharma, “It’s all about finding the sweet spot between file size and video quality that works best for your needs and workflow.”
Using External Capture Cards
For those seeking professional-level video quality and more control over their recordings, an external capture card is the way to go. These devices act as an intermediary between your Xbox and your recording device (usually a computer), allowing for higher resolutions, frame rates, and more advanced recording options.
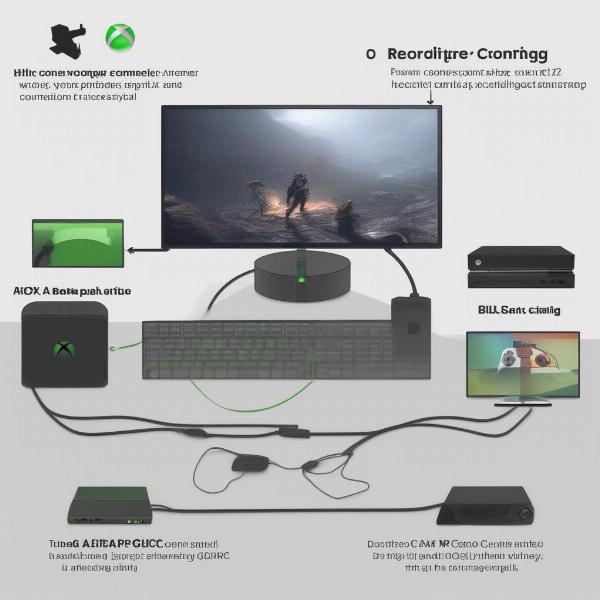 external capture card connection diagram
- Benefits of Using a Capture Card: Capture cards generally provide higher quality recordings, with options for 1080p, 4K, and even 120fps capture capabilities. They also often include features for live streaming and customizable overlays.
- How to Set Up an External Capture Card: You’ll typically need to connect your Xbox to the capture card via HDMI, and then connect the capture card to your computer via USB. From there, you’ll use the capture card’s software to record your gameplay. These cards often come with their own recording software, or you can integrate them into other recording tools.
- Software for Capture Cards: Popular software options include OBS Studio, Streamlabs Desktop, and the software provided by your capture card manufacturer.
How much storage do I need for Xbox recordings?
The amount of storage you need will depend on the length and resolution of your videos. Longer videos, especially at higher resolutions, will require significantly more storage.
Tips for Better Recordings
Beyond the technical aspects, there are several things you can do to improve the overall quality of your game recordings:
- Clean Gameplay: Ensure your gameplay is smooth and free of distractions, such as clutter on the screen or erratic camera movements.
- Good Audio: Make sure your microphone is positioned correctly to minimize background noise, and adjust your recording settings so that your voice is clear and easy to understand. You might also consider using a noise gate and other audio filters to improve sound quality.
- Edit your videos: Take the time to edit your recorded videos to make them more engaging for your audience. Remove unnecessary sections, add transitions, and include background music to keep your viewers entertained.
- Experiment with different recording lengths: Don’t be afraid to try recording short clips, and longer game sessions, to see what works best for the content you want to create.
Sharing Your Recordings
Once you’ve recorded your gameplay, sharing it with others is an important part of the process. You can upload your clips directly from the Xbox to various social media platforms. The share menu in the capture & share section will help you share to Xbox Live, Twitter, and other social media accounts. For more options you can copy the file to external storage then share the video from a computer or phone. It’s easy to share your videos when you understand the various options available. For those who are also PC gamers, you might be interested in how to access similar features, like the how to pull up xbox game bar on pc.
“The key to engaging video content is consistency and quality,” shares video editor, Ben Carter. “Focus on the overall viewing experience, from audio to video, and strive to make each clip engaging and professional.”
Can I record party chat on Xbox?
Yes, you can include party chat in your Xbox recordings. You can manage audio recording options in the capture & share settings menu.
Conclusion
Recording your gameplay on Xbox is a straightforward and valuable skill for any gamer. Whether using the built-in recorder or investing in external hardware, the ability to capture and share your gaming moments opens up a world of possibilities. By applying the tips and techniques we’ve covered, you can produce high-quality videos to share with friends, build an audience, or simply relive your favorite gaming moments. At SupremeDuelist.blog, we strive to bring you the best information to help you master all aspects of gaming. We encourage you to explore the recording capabilities of your Xbox and unleash your creativity, and capture all of your best gaming moments. Now it’s your turn, go record something amazing!
Leave a Reply